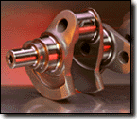
Crankshaft Grinding Information

RPM - Ron's Precision Machine, Inc.

Engine Rebuild Kit and Parts Online Catalog

Engine Rebuild & Assembly Balancing & 
Blueprinting
Cylinder Heads
Engine Rebuild Kits Engine Start-up Other Related Web Sites Page 1
Crankshafts Degree Cam Other Related Web Sites Page 2
Purchase warranty & Return Information About the owner of RPM Frequently Asked Questions
MASTER ENGINE REBUILD KITS & PARTS

Home
Don't forget to save to favorites

Go to Import Crankshaft kits These crankshaft are machined by Topline and are not indexed but good quality.

Also see Crankshaft Kits for import and domestic kits with matching bearings.

Information on this page will explain what index is and it's importance! And crankshaft installation guide.

We no longer do any machine work or labor but the information below is still helpful.

CRANKSHAFT grinding & Indexing

When a crankshaft is turned to an undersize, it can and does change the stroke and degrees apart of each rod journal. To index a crank, first the machinist has to know where the stroke and degrees (swing) are. Once this is established, with the right machine to start with, the crankshaft can be indexed for both swing and stroke.

Indexing is part of the blueprint process and is very important so that compression, because of deck height variation do to different stroke between rod journals, can change compression ratios between cylinders. Also swing (degrees apart between rod journals) will change the relationship between the camshaft and crankshaft.

Most cranks can be indexed and still make .010 undersized journals, if the crank isn't too far off from the factory.

Crankshafts that are ground to within +or- .0001 (that is one ten thousands of an inch) on rods and mains gives you a crankshaft that will give you full bearing contact with a lot longer life.

If you want more strength and longevity from your engine this is a must. You may also want your crank shot-peened if for race or heavy towing.

So, as a review, indexing is simply grinding all crankshaft rod journals to be all the same stroke as well as the right degrees apart.

Crankshaft Installation Guide
1. IDENTIFY MATCHED PARTS:
Before engine disassembly, all connecting rods and matching caps should be numbered according to cylinder location. Each main bearing cap should be numbered according to it's location in the block.

2. CHECK CONNECTING ROD HOUSING BORES:
Connecting rod housing bores must be checked for roundness and size using bore gauges or inside micrometers. If the housing bore does not meet specifications, it should be reconditioned by a qualified machine shop.

3. CHECK MAIN BEARING BORES:
With the engine block inverted, main bearing bores must be checked for alignment and size. If necessary, engine block should be reconditioned by a qualified machine shop before reuse.

4. CLEAN OIL PASSAGES IN CRANKSHAFT:
Ensure that oil ways and holes are cleaned using a brush and compressed air. When using compressed air, be careful not to blow dirt onto previously cleaned surfaces

5. CLEAN OIL PASSAGES IN ENGINE:
Thoroughly clean oil ways using compressed air and a brush. Be careful not to blow dirt onto previously cleaned surfaces

6. CLEAN MAIN BEARINGS AND BORES:
Bearings and main bearing bores must be cleaned and dry.

7. CHECK OIL HOLE ALIGNMENT:
Ensure bearing locating tang lines up exactly with recess in block and that oil feed hole lines up with hole or slot in bearing to ensure proper oil flow.

8. LUBRICATE BEARING SURFACES :
Lubricate all bearing surfaces and rear lip seal with clean engine oil or high pressure lube. We do not recommend the use of greases for this purpose.

9. CRANKSHAFT INSTALLATION:
Gently and squarely place the crankshaft onto the main bearings. Care should be taken to prevent damage to the bearing flange thrust surfaces. Main caps and bearings must then be installed in proper positions.

10. TORQUE MAIN BEARING BOLTS:
All bolt threads must be cleaned and lightly lubricated to obtain correct torque readings. Final tightening of all bolts must be in accordance with engine manufacturer's specifications. Crankshaft should rotate freely after tightening procedure. Check for proper oil clearance prior to final assembly of main bearings.

11. CONNECTING ROD INSTALLATION:
Before installing piston and rod assemblies, rod bolt threads must be covered to prevent damage to crankshaft journals.

12. ROD CAP INSTALLATION:
Match rod caps in accordance with cylinder numbers on connecting rods. Check for proper oil clearance prior to final assembly of the rod bearings. Torque rod bolts or nuts to manufacturer's specifications.

13. CHECK PROPER END CLEARANCE:
By using a feeler gauge, check for proper end clearance between crankshaft thrust and bearing flange to manufacturer's recommendations.

14. PRIME ENGINE OILING SYSTEM:
Before starting engine, oiling system must be primed to prevent dry start and damage to bearing surfaces


RPM - RON'S PRECISION MACHINE, INC.
69 E. 580 N.
Santaquin, Utah 84655
1-801-754-5338 or Toll free 1-866-700-5877

Contact us anytime 24-7

Call toll free 1-866-700-5877 to purchase parts or click Contact us anytime 24-7 or Order Form

HOME